For this homework assignment we had to make a
vase of any kind then retouch upon it in ZBrush and make detail in it in
ZBrush. I just chose a simple Greek vase for the modeling then started giving
my vase detailing and indentations that make it look deteriorated. I should of
modeled out more of the vase in order to make it look more finished and have
the vase’s design in the bottom (sword and flower) better shaped. Over all it
still complement each other since it is supposed to be an old vase.
Thursday, August 8, 2013
Tuesday, August 6, 2013
Pillar/Rock ZBrush
For this hw assignment I had to create a rock in ZBrush
and then create a pillar in Maya, import it to ZBrush and then make adjustments
in it with the brushes. It was a pain getting use to ZBrush and the way you
have to move the camera using keys alt and ctrl to scroll, rotate and zoom in.
Over all I just need more practice on ZBrush to get good detail on my models
and make them shine.
Thursday, August 1, 2013
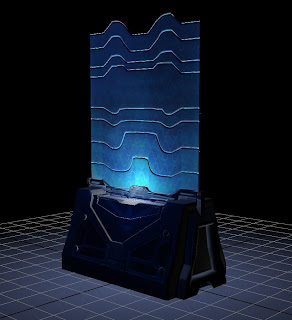
Barrier #2
For this homework assignment we were given the task to amplify
the models we have done already. I added extra lighting and a good plane to
hold the model in place as a presentation. It was fun creating the model, but
the texturing is pretty difficult. It was only obvious that I had to manipulate
the texture to a point where it looks almost exact as the concept. The only
thing I didn’t model out was the front of the barrier but everything else moves
up for it and makes it look like it pops out.
Tuesday, July 30, 2013
Barrier
For this homework assignment
I was given the task to model out a barrier, texture it, then bake the lower
poly version to the high to make a normal map texture. It was fairly simple
creating the model to begin with since it was only one single entity. I created
the whole model off of a square so it was fairly simple to create a high poly
model of it, but it was hard texturing the thing. I only changed a couple of
menu options for the automatic wrap and it laid it out for me perfectly. After
that it was clear that I just used the actual image for the concept to give the
model its texture.
Thursday, July 25, 2013
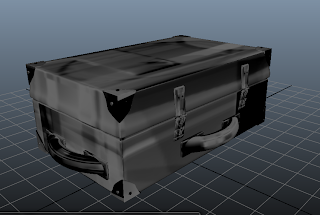
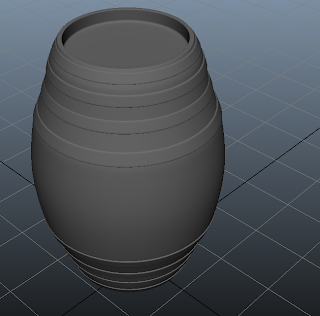
Baked Briefcase and Barrel
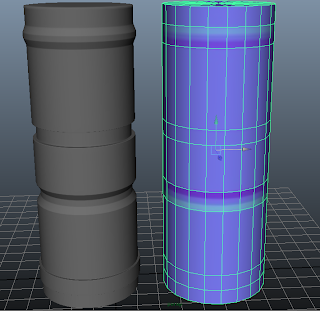
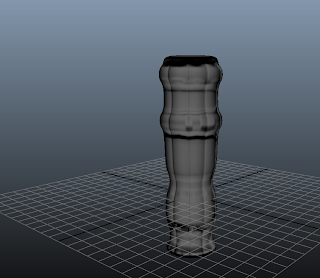
This has to be one of the most difficult homework
assignments I’ve ever attended to accomplish. We had to bake a high poly model
barrel and briefcase into another low poly version of themselves. It was hard
getting the right sized meshes without making the whole composition look sloppy
or weird to begin with. Overall I did the assignment, but it just doesn’t look
good at all. I’m going to have to look up more ways to bake in Maya and what
kind of geometry is better to bake using as a source and a target.
Tuesday, July 23, 2013
Barrel/BriefCase Seperation
This homework assignment we were given the task to separate
the geometry of the past Barrel and Brief Case I had created. It was not a
difficult task to create low poly versions of them. The only annoying part was
making them out of a lot of separate pieces. Cutting up the model isn’t that
easy if you’re doing it the first time, but I believe I caught up to it.
Thursday, July 18, 2013
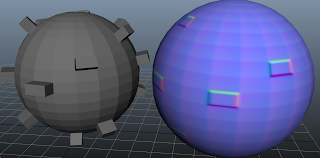
High To Low Baking
The homework assignment
was all about baking high polyed models onto simplified models in order to save
poly counts and just texture in the indentions. It is important to make sure
the geometry you want to effect is the biggest one and have the high polyed
model centered inside. It’s not that difficult working on the normal map but
the triangle normal map was really annoying trying to get it to work perfectly.
Tuesday, July 16, 2013
Baking a Model
Thursday, July 11, 2013
Midterm Brief Cases & Barrels
This homework midterm assignment was one of the
hardest ones given to me. I had no idea how to work crazy bump efficiently and
how to save a Maya file object into an obj file till today. Still, the
assignment was finished and I ended up mapping everything efficiently except
for the barrel. It’s funny to think about it this way since the barrel looks
better than the brief case (in my opinion). The textures I picked out for the
brief case is actually very clumsy looking on it. Over all it was fun creating
the texture formats and everything else, including the model for this
assignment.
Tuesday, July 9, 2013
Knife
This assignment we were given the task to create a knife
and texture it. I had the initiative to put some lighting on it before I took a
snap shot of it. The problem I ran into was creating the handle. The handle was
made out of a square, and it was good up to a point where I couldn’t touch the
UVs at all without distorting the geometry. It was hard to get good textures
for the model since the image itself has many different characteristics. Over
all it looks good about the blade and the handle itself. The rest of the metal
pieces looks like it has a repetitive texture and it looks dull for it.
Tuesday, July 2, 2013
Modeled and Textured
This model took me an average amount of time in
order to do. The hardest thing to do was obviously the texturing. It truly is a
tedious job to do if you have little experience on it. There was many different
things I could of done differently like the planar mapping on the holed plank.
The main organization was technically done since I can just easily go back and
edit the UVs with their separated layers. I took too much time texturing the
rocks for the model prop, but it gives you an overall view of what kind of
model it is and how it looks like.
Monday, July 1, 2013
Crate Final
In
this assignment I was given the task to make the texture on the past model
better. It wasn’t that hard since I already had the squared planar mapped and
the whole model is basically composed of just rectangles and squares. The only
thing that is more complicated than that is the crates corners, bolts and the
majority of the volume. In order for me to get the right sizing is to keep them
separated and UV them separate while I picture them in their own place every
time I make a new UV snap shot. I believe I finished this model and made it
look good in the end.
Tuesday, June 25, 2013
Textured Crate
Creating the model was a breeze for me. The texturing in the
other hand is one of the most annoying things ever. Every time I edit the
texture, there’s always something that looks like its tiled. Then it’s the way
some of the side stretch and make a big blurry look to it. I made sure I used
images with high quality and had my snap shot made in high quality as well. I
ended up making the texture look like this on the model, but it still looks
weird with the texture stretched in the inside indentation of the crate and the
ribs on the side, other than that the model looks good, but still not game
ready.
Thursday, June 20, 2013
Crate Model
The main thing that makes any model shine is the texturing
done and mapped on it. This is just a model of a crate prop I was handed out by
the teacher and it was done using simple techniques, but it is shown in smooth
so it is good for any engine that needs a high render model. In the end putting
the textures on this model will be hard since I have little experience in
mapping, but making the texture for it will be fun no doubt.
Tuesday, June 18, 2013
Wall Texture
This wall texture was not easy to create. Not only were the images too small (looked like the camera had poor quality), but they’re completely random types of textures to begin with. In order for me to blend them in properly I had to focus more with the placement of the textures. They made more sense to me when they were placed in this way.
It was
interesting going through crazy bump and looking at my texture on a model. It
looked very detailed b/c of the marble, but it made it look more like regular
stone than just marble. At the same time it looks really good and I can’t wait
to create more complex ones.
Thursday, June 13, 2013
Texture Selections
These are just a few random textures from things found at home, from furniture, to walls and kitchen appliances. It is of the highest quality I can take since I only have limited resources when it comes to tools like my camera. It might not be the best of cameras but it can capture the image well and with sufficient detail in order for me to recreate these textures in photoshop. It will be fun mapping them out in certain models i have already created or will create in the future.
Subscribe to:
Comments (Atom)


